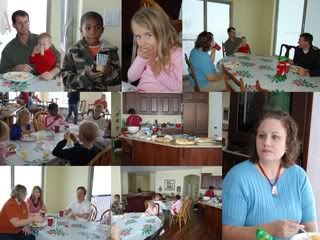
 (This is the medium photobucket picture, as you can see it is actually smaller than the default blogger large. I like my images 640x480, which works on my blog)
Want to make a collage like this? Want to show it on your blog? Want to display a bigger picture than the defaults on blogger allow? You can do it. Well, most of it. The first step won't work if you have a Mac, but those of you who have owned your Macs for a while probably know a similar program that can do something like it.
Kim asked me how I do my collages, so here is my tutorial, step-by-step. The first thing you must do is download Picasa. This is an awesome photo organizing/editing/sharing program. I have had it for over five years, since I bought my first digital camera. I love, Love, LOVE it!! Once you have installed it, it should automatically recognize the picture files on your computer and organize them, by date I think.
Once you have your photos in Picasa you can choose the ones you want to use for your collage by clicking on the picture, and then you click on an icon that looks like a pushpin in a small box in the lower left hand corner. You can select several pictures, but the more you select, the smaller they will be in your collage. Once you have selected all your pictures, you click on the icon titled collage on the bottom of your screen, towards the right. Select the type of collage, and shuffle your pictures, until you like the way it looks. Then you can save your collage.
Alright, next step. If you don't already have an account with photobucket, sign up for that. It is free. Once you have an account, click on my albums. This will bring up a box which allows you to upload images and video. (I have never tried the video). Click on Choose Files, then you have to choose the folder on your computer that contains your pictures. Find the one the collage was saved in, and upload it. I forgot to tell you to be aware of the field inside the photo upload box, where it says, reduce size to: ___ On mine, I use the large 640 x 480, but I have increased the size of my posting area, so there is room for my collages. You may have to make your collage smaller to fit in your posting space. (I just realized, I may have to do that for this blog).
Once it has loaded--it could take several minutes--scroll down to Save and Continue, and press that. Now, your image is shown as part of your albums. If you drag the mouse under the picture, it will show you Email and IM code, Direct Link code, HTML Code, and IMG Code. Now, this part is a little annoying, because if you move your mouse slightly, these codes will disappear. You have to hold it just right. Click on the HTML Code--this should highlight it--then right click and choose Copy.
This is the last step. On your blog, you should make a new post. Click on the Edit Html tab. Now right click in the blank space and choose Paste. If you have done any cutting and pasting with your computer, you already know how to do this. Next, click on the Compose tab. Your picture should be there, and you can type whatever you want to say after that.
Hey, I hope that helped. We had a great Christmas. Thank you to family who came over for dinner in the middle of that wonderful White Christmas snowstorm. Happy Holidays!

1 comments:
Thank you Nan!
Post a Comment